Pumpkin Gingerbread

Dessert

Growing up in the American Midwest, the turn toward autumn was unmistakable. The trees burst into glorious color, fruit stands selling apples and pumpkins sprang up along country roads, apple cider was abundant in every grocery store, and the same day might see you shivering into a hoodie and basking under the afternoon sun in a tank top. It was never open to interpretation and there was never any doubt—you knew when fall had arrived.

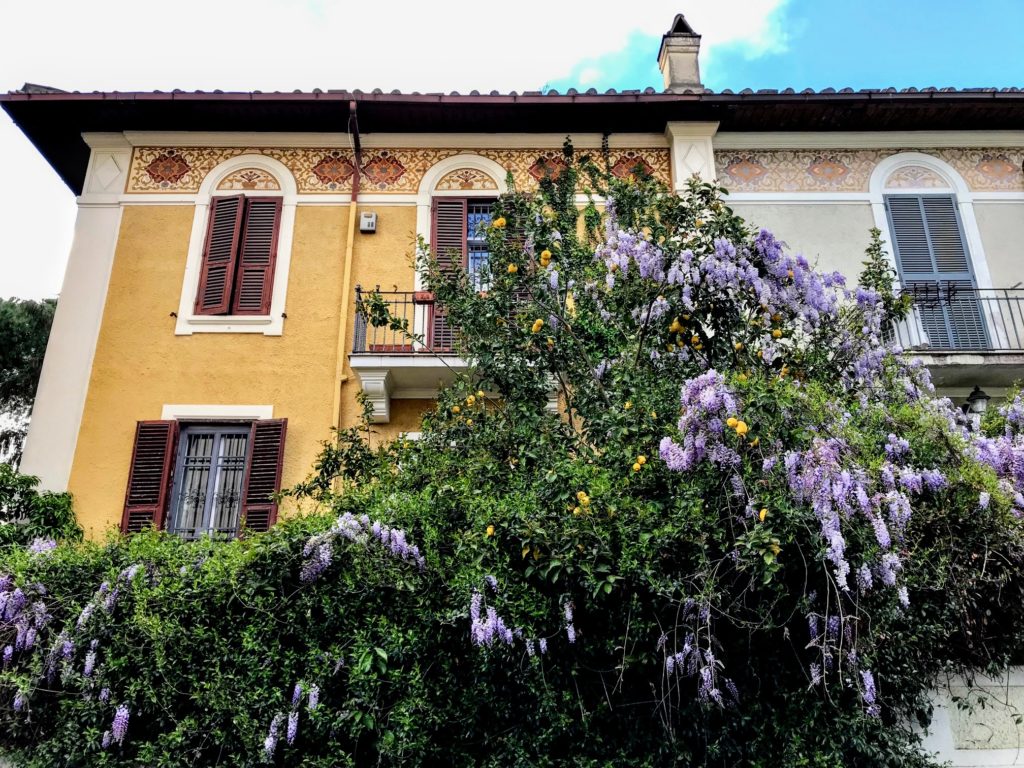
Autumns in Rome are somewhat subtle, compared to all of that. The leaves of the plane trees turn yellow and then drift their way to the ground. The temperature drops from sweltering to pleasant and it rains occasionally, just to break up the monotony of so many perfect days all in a row. It’s gradual, and that makes it difficult to put your finger on exactly when it slips from summer to fall.

After two years, I’ve found that the best way to mark the passage of the seasons in Rome is not to look at the date on the calendar or the daily forecast, not even to trust your instinct of what you think it should be, but to look to what’s in the markets. Eating in Italy is nothing if not seasonal; there are many fruits and veggies that you simply can’t buy in the off season. In the winter, the markets are full of citrus (lemons!); in the spring, puntarelle and then artichokes; in the summer, tomatoes and peaches. And in the fall, you’ll find apples, cavolo nero, and pumpkins.

These aren’t the type of pumpkin that you find in the U.S., to carve or arrange artfully. They definitely aren’t squash, either, not butternut or acorn, but definitively pumpkins: big, squat, green-and-yellow, a bit warty. You don’t buy the entire thing, but a portion of one—500 grams, say—for risotto alla zucca, or ravioli stuffed with it, or just to roast for a simple contorno. If you don’t want the hassle of peeling and seeding, you might buy it in the grocery store, in ready-to-use hunks, or pre-chopped and frozen into bite-size nuggets.

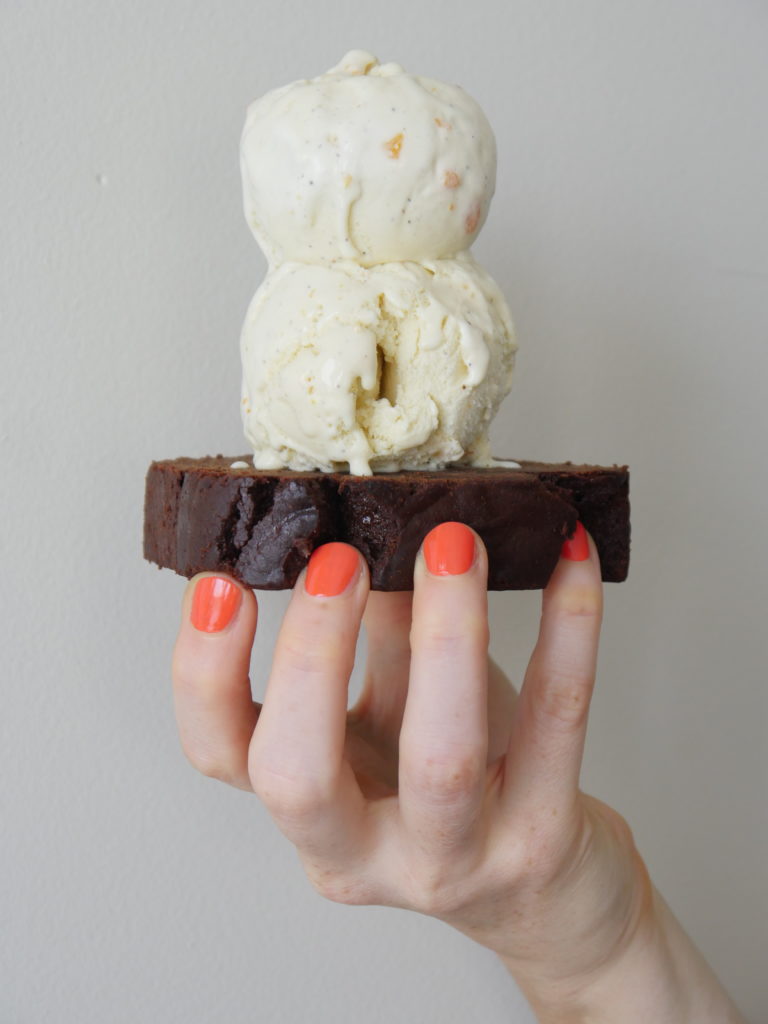
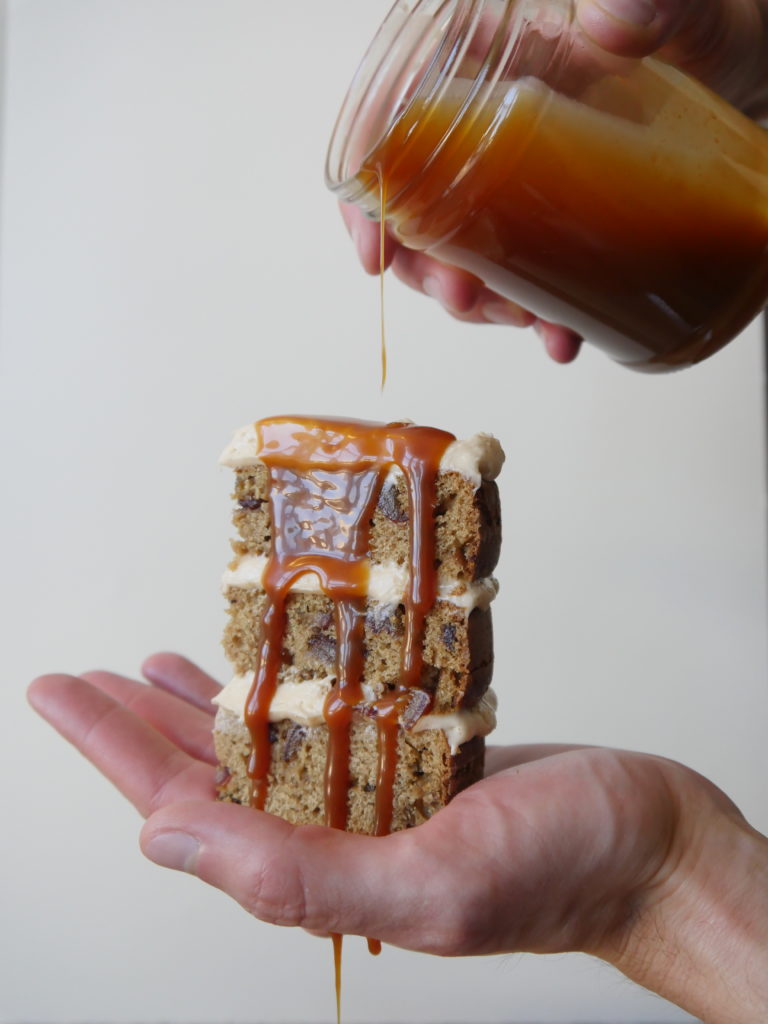
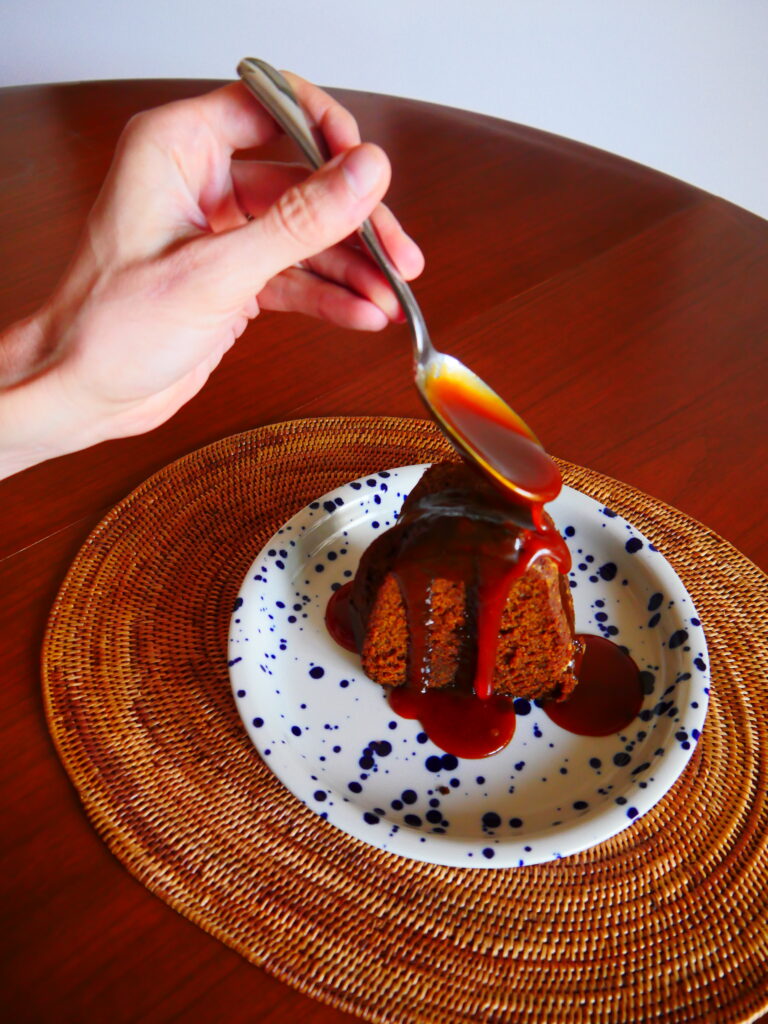
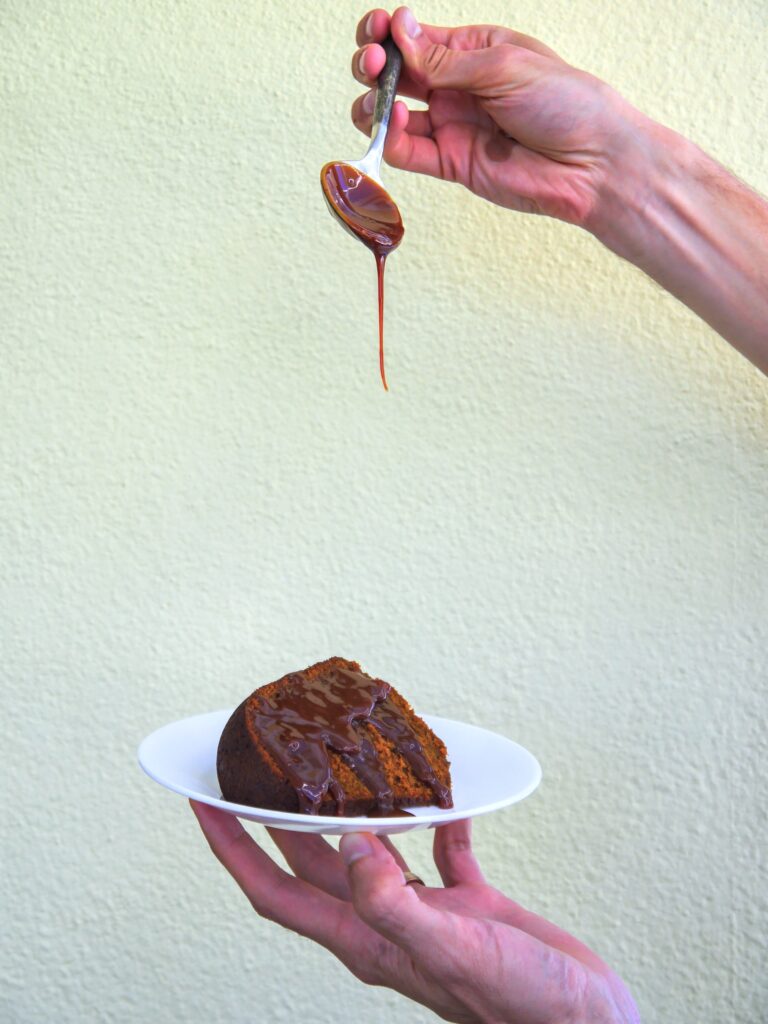
Pumpkin is very much a Roman thing, but pumpkin puree is not. Those cans of Libby’s, the ones you can usually get for $1 a piece or so? If you can find one here—a big “if,” and pretty much only possible at the grocery near the American University of Rome dormitory, on the shelf beneath all of the Old El Paso products—it’ll set you back €6 or more. So when I did splurge on a can, I wanted to use it in a recipe that would make the most of it. I developed this recipe in fall 2020, made it once, and always planned to fine-tune and post it. I even got my Chief Recipe Taster be the hand model in a photo for it (see below). But life got in the way, and I nearly forgot this cake at the bottom of my files until I came across the photo and decided to re-test the recipe. It was better than I remembered and also one of those cakes that gets better the longer that it sits, thanks to the heavy dose of spices and oil-based batter, which keeps it soft and moist. With a scoop of gelato and a drizzle of salted caramel sauce, you’ll know it’s fall, no matter where you are.

Pumpkin Gingerbread

Source: Adapted from Claudia Fleming’s Stout Gingerbread

Makes one 10” Bundt cake

Active time: 20 minutes; total time ~70 minutes

Note: This cake is good as is but best served with salted caramel sauce.

Ingredients:

  • 480 grams flour
  • 1 tablespoon baking powder
  • 2 teaspoon baking soda
  • 2 tablespoons ground ginger
  • 1 ½ teaspoons cinnamon
  • ½ teaspoon nutmeg
  • ½ teaspoon cloves
  • ½ teaspoon black pepper
  • 1 teaspoon salt
  • 2 eggs
  • 425 grams (1 15 ounce can) pumpkin puree
  • 340 grams molasses
  • 150 grams canola or veg oil
  • 215 grams brown sugar
  • 225 grams boiling water

Instructions:

  • Preheat oven to 175°C/350°F. While the oven is preheating, butter and flour a 10-inch Bundt pan.
  • Stir together all of the dry ingredients (flour, leaveners, spices, salt) in a medium bowl. Set aside.
  • Mix together all of the wet ingredients (eggs, pumpkin, molasses, oil, brown sugar), except the boiling water, in a large bowl.
  • Add about 1/3 of the dry ingredients to the wet, stirring well to incorporate. Add 1/3 of the boiling water, again stirring well to incorporate, and repeat until the dry ingredients and boiling water are fully added.
  • Pour the batter into the prepared Bundt pan and smooth the top with a spatula.
  • Bake the cake for 45–50 min. After removing from the oven let the cake cool in its pan for ~10 minutes before inverting it, removing the pan, and letting it cool completely on a wire rack.

Rye-Flour Chocolate Chip Cookies

Dessert
A woman holds four large rye-flour chocolate-chip cookies in her hands.

The chocolate chip cookie.

One of the pillars of the American dessert canon, and one of the simplest, right? There’s no pie crust to conquer, no cake that might fall. Making chocolate chip cookies is so straightforward that it’s one of the first recipes American children are taught to make.

Easy, right?

Until the beginning of this year, I would have agreed without question. I’ve made hundreds, perhaps thousands, of chocolate chip cookies over the years, and never had much issue. Until now.

Enter: the rye chocolate-chip cookie, aka, my nemesis.

I knew exactly what I wanted: a chocolate-chip cookie for the adult palate. It should be less sweet and with a deeper flavor, just enough different to be noticeable, but not so full of rye that it would make you think you were eating health food disguised as dessert. Since I already have a stellar chocolate chip cookie recipe, thanks to my mom—to this day, hers are my hands-down favorite—I figured I could start by simply substituting some rye flour for all-purpose. I did a little research and decided that a 30% swap would be a good place to begin.

Things started going wrong almost from the beginning. Even though I followed the recipe and the measurements exactly, my dough looked greasy. The cookies tasted fine, but they spread more than I wanted them to and didn’t have the body or heft I was looking for. I made a few adjustments and tried again and again and again, reducing the amount of butter, adding more flour, toying with the ratio of white sugar to brown sugar. And along the way, I learned some things.

1. Butter. There were two variables at play here: European vs. American butter, and different types of European butter. European butter has a higher percentage of butter fat than American butter and thus a lower percentage of water. In baking, the two are not necessarily interchangeable; according to the inimitable Stella Parks, swapping American butter for European is a “fundamental alteration” of a recipe. Stella suggests using less European butter and slightly more water to make up for the differences.

In Stella I trust, so I decreased the amount of butter but that didn’t solve the problem—my cookies were still coming out greasy. I couldn’t understand what had changed, until the next time I went to the grocery store.

When we moved to Rome, our closest grocery was a Coop so I bought Coop store-brand butter for baking and had good results. But at the start of this year, our Coop became a Conad, so I switched to their store-brand butter. Conad butter must have a different percentage of butterfat, because every time I used it, and no matter how much I reduced the amount of butter that I used, I ended up with greasy cookies. Out of desperation, I switched to Lurpak, which solved the too-greasy issue. That left me free to move onto…

2. Flour. Great, my cookies were no longer greasy. Unfortunately, they were also super soft and delicate, not the hefty, sturdy types I was looking for. I couldn’t understand the issue, since I was using tipo 0 flour, which was supposed to be the Italian equivalent of all-purpose flour. “Supposed to be” is the key phrase here, as buying flour in Italy is not as simple as it is in the U.S. Here, can you buy flour not just by how finely ground it is (tipo 00 versus tipo 0, for example) but also by type of wheat—grano duro (hard wheat) versus grano tenero (soft wheat)—and that’s even before you get into whole wheat flour, chestnut flour, rice flour, chickpea flour, etc.

After much trial and error and Googling, I found that my cookies performed the best when made with “Manitoba” flour. Named after the Canadian province from which the variety of wheat originally came, farina di Manitoba is soft but has a relatively high-protein content. It’s usually recommended for bread, but I found it gave me the texture and structure I was looking for.

3. Brown sugar. Although American-style brown sugar comes in light and dark varieties, they behave similarly in baked goods if you need to swap one for the other. Here in Italy, the closest thing to brown sugar that I’ve found is zucchero di canna integrale atado dolce, or whole cane sugar. It has a bit of molasses flavor, but much less than American-style brown. It also isn’t as moist and has a grainier texture. It’s delicious, don’t get me wrong, but took some getting used to since it behaves differently.

4. Salt. The last problem I needed to solve for was salt. I relied on primarily on recipes developed by and for U.S. cooks, which made sense—I learned to cook in the U.S. and chocolate chip cookies are one of the few things we can (mostly) call our own. But U.S. recipe developers were, of course, using U.S. ingredients, and most called for table salt or Diamond Crystal kosher salt, neither of which are available in Rome. “Sale fine,” a grind of salt somewhere between the two, is commonly available and what I keep on hand. It took a few tries to get the exact weight correct.

Now that I’m writing it out, I realize that I spent months developing the perfect rye chocolate chip cookie for my Italian kitchen, and that when (if?) I move back to the States I’ll have to test the recipe all over again. Frankly, that realization just makes my above statement that much more true: this recipe has been my nemesis. Thank goodness that it’s also my new favorite cookie recipe.

Rye-Flour Chocolate-Chip Cookies

Sources: Inspired by Milk Street

Makes ~17 cookies

Active time: 30 minutes; total time 12 hours

Ingredients:

  • 140 grams rye flour
  • 200 grams room-temperature butter
  • 150 grams sugar
  • 150 grams brown sugar
  • 2 eggs
  • 15 grams vanilla
  • 250 grams farina di manitoba or all-purpose flour
  • 5 grams baking soda
  • 12 grams salt                                                                                              
  • 225 grams chocolate chips (I like a mix of dark, milk, and white)

Directions:

  • Toast the rye flour in a skillet over medium heat, stirring regularly—especially as it gets hotter—for about 8 minutes. Remove from heat and let cool when the flour is browning (it won’t brown uniformly, which is fine; that’s where the stirring helps) and giving off a toasty, popcorn-y scent.
  • In a large bowl, cream together the butter and sugars until well-combined and fluffy. Add the eggs and vanilla; incorporate well.
  • Add the flour, baking soda, and salt. Incorporate lightly, then add the chocolate chips. You’ll want the dough to be cohesive, but not too much so—over mixing can affect the cookies’ texture. Cover the dough and let it rest in the refrigerator overnight.
  • Preheat your oven to 350°F (175°C) degrees. Weigh the dough into ~70 gram portions and gently roll these into a ball—don’t roll them too smoothly, or this, too, will affect the texture of the final cookie. Sprinkle each ball with sea salt and bake for ~10 minutes. Let them cool, if you can, on a wire rack before devouring.

Very Lemon-y Lemon Cake

Dessert
A triangular slice of yellow cake with a white glaze sits on top of one hand, while the other holds a lemon atop the slice of cake.

Our first winter in Rome was something of a non-event, climatically speaking. As a born and bred Midwesterner, I am accustomed to (although not enamored with) proper winters: subzero temperatures, snow, ice, wind, the whole shebang.

Rome, in contrast, was unbelievably—and perhaps unseasonably, according to acquaintances—mild. Sure, there were some grey and rainy days, and a handful when I needed to wear a parka, but the biggest surprise of the winter was how mild it was, so much so that it was nearly indistinguishable from spring. The magnolias bloomed in February, and we wandered the gardens at Villa d’Este in light jackets. In March the tulips were out and we hiked around Frascati in shirtsleeves. By April, the wisteria was in full scent and color, and it was almost too warm for a few days in Florence.

Lemons & wisteria in the neighborhood.

With seasons unlike those I’m used to, the surest way I’ve found to keep track of the progress of time in Rome is to go to the market. When the flood of Sicilian citrus fruits is at its zenith, it’s winter. When you start seeing buckets of cold water full of puntarelle, spring is just around the corner. Artichokes, asparagus, and strawberries appear next. And through it all, there are lemons.

In December, we began noticing that the kinda-regular looking leafy green trees we’d walked by for months were sprouting yellow globes. It wasn’t just one or two trees, and it wasn’t just a few fruits on each tree—it was a truly extravagant amount. Around our neighborhood, along the train tracks through the city, roads in and out of town: everywhere we turned, there they were. There are orange trees, too, but that fruit came and went relatively quickly; the lemons seemed there to stay. Even now, they shine out of dark leaves, competing with the bougainvillea blossoms.

You’d think people would use all of that fruit, but you’d be wrong. The ground underneath most of the trees was littered with it, so we felt we had no choice but to “liberate” some of the lemons from neighborhood trees. We juiced a great many, squeezed it onto fish, made it into salad dressings or lemon curd. I also became fixated on the idea of the perfect lemon cake: tender, with fresh lemon flavor in every bite. After many (many) attempts, I landed on this one. There’s lemon zest in the cake batter, which I bake in an 8″ round tin, rather than a loaf pan, so that the soaking syrup gets in deeper. The confectioner’s sugar and lemon juice glaze gives it an extra sweet-sour punch. This cake might just be the taste I think of whenever I remember our first winter and spring in Italy.

Very Lemon-y Lemon Cake

Sources: Adapted from King Arthur Flour

Makes one 8″ cake

Active time: 30 minutes; total time ~65 minutes

Notes:

  • You can control how lemon-y you want this cake to taste. Use more lemon zest in the cake batter, or more lemon juice in the glaze, if you want a stronger flavor, and less if you want a more subtle one.
  • This cake is even better the day after it’s made. Giving it more time to sit before serving means the syrup has more time to soak in, permeating the cake with additional flavor.

Cake Ingredients:

  • 200 grams granulated sugar
  • 2–6 lemons (use the greater number if you have very small lemons or want more lemon flavor)
  • 110 grams butter, at room temperature + more for greasing the pan
  • 2 eggs
  • 180 grams all-purpose flour
  • 1 teaspoon salt (plus more, to taste)
  • 1 teaspoon baking powder
  • 115 grams milk

Soaking Syrup Ingredients:

  • 75 grams fresh lemon juice
  • 150 grams granulated sugar

Glaze Ingredients:

  • 125 grams confectioners’ sugar
  • 2–3 tablespoons fresh lemon juice

Directions:

  • Make the cake: Preheat your oven to 350°F. Butter and flour an 8″ cake pan; set aside.
  • Weigh the sugar into the bottom of a large mixing bowl. Zest the lemons into the sugar, then rub the zest into the sugar with your fingers until well combined and fragrant.
  • Add the butter to the lemon zest/sugar mixture and beat in with an electric mixer until fluffy. Add the eggs, one at a time, scrapping down the sides of the bowl between additions.
  • Add the flour in three parts (60 grams each time), alternating with the milk, beating well to combine. Your last addition of dry ingredient should be 60 grams of flour plus the salt and baking powder. Scrap down the sides of the bowl with a spatula, and give it one last stir.
  • Pour the batter into the prepared cake pan, and smooth the top. Bake the cake for ~35 minutes, or until a cake tester inserted into the middle of the cake comes out with just a few crumbs clinging.
  • Make the soaking syrup: While the cake is baking, stir together the lemon juice and sugar. Microwave it on low power for a minute or so, then stir until the sugar dissolves.
  • Once the cake comes out of the oven, slowly and evenly pour the soaking syrup over it. Let the syrup soak in and the cake cool.
  • Make the glaze: Once the cake has cooled, stir together the confectioners’ sugar and lemon juice. You can control the thickness of the glaze by adding more or less lemon juice. Pour it over the top of the cake, smoothing if needed, and let set before cutting and serving.

Cardamom & Candied Orange Peel Ice Cream

Dessert

The start of July signaled the tipping point into what I consider DC’s fourth season: steam room. In a matter of hours, it seems, the weather turned from “pleasant” to all-day-every-day hot & humid.

I loathe and love this season. Loathe: constant sweatiness and unruly hair. Love: abundant daylight; sunrise runs in Rock Creek Park; summer fruit. Despite the stickiness, the balance, for me, tips more towards love. It’s simple, really: I love summer because it is an unabashed call to unabashed, public pleasure. Other seasons have their joys, but they are somewhat more private ones. You’re more likely to experience them with a small group of people—a fall bonfire with friends, say, or a family holiday gathering. But summer is all out. It’s water slides on the front lawn, concerts in the park, eating watermelon slices on a picnic with friends. It’s a harkening back to the time before you worried about meeting your yearly performance assessment or cared if your bathing suit showed your stomach; a time when you had time to be bored, when you lived in the now. Summer is when you have fun for the sake of having fun. They’re meant to be a release, an escape valve from the grind of the rest of the year. They’re meant to be a corporate enjoyment.

And what food is more enjoyable than ice cream? To misquote the great Ina Garten, “You can be miserable before you have ice cream and you can be miserable after you eat ice cream but you can’t be miserable while you are eating ice cream.” Not even if you’re eating it during a yearly performance assessment, while worried about your stomach pooch, during DC’s fourth season.

Cardamom & Candied Orange Peel Ice Cream

Sources: Adapted from Dorie Greenspan’s Baking: From My Home to Yours

Makes ~2 quarts of ice cream

Active time: ~30 minutes, plus bowl chilling, custard chilling, & churning time

Ingredients:

  • 2 cups heavy cream
  • 2 cups whole milk
  • 6 egg yolks
  • 2/3 cup sugar
  • 1 heaping teaspoon ground cardamom
  • 1 pinch of salt
  • 1/4 cup chopped candied orange peel
  • 1 tablespoon vanilla extract (I use Singing Dog Vanilla’s Double Fold Vanilla Extract, and it is worth every penny)

Directions:

  • The day before you plan to make the ice cream, put the machine bowl in the freezer.
  • The next day, pour the cream and milk into a heavy-bottomed pot and bring the mixture to a boil over medium heat. Meanwhile, whisk together the egg yolks, sugar, cardamom, and pinch of salt in a medium bowl.
  • When the cream and milk are at a boil, turn off the heat and whisk one-third of the mixture into the egg yolks, whisking vigorously as you do so. Slowly add the rest of the cream and milk to the yolks, whisking all the way.
  • Pour the mixture back into your saucepan and heat over medium. Keep stirring, or you could end up with curds in your custard, which no one wants that.
  • There are two ways to test whether your custard is done. One is to dip a spoon or spatula into it and then run your finger through the custard; your finger should leave a clear trail with no custard running into the track. The other is to take your custard’s temperature: it should be between 170–180°F.
  • Remove the custard from the heat and pour it into a clean bowl. Let it cool for several minutes before stirring in the candied orange peel and vanilla. Press a piece of plastic wrap directly onto the surface of the custard and refrigerate until cold. The custard will be fine in the refrigerator for a day or two, if you want to spread out the work load.
  • Once the ice cream bowl and custard are cold, churn the custard per your machine’s directions. My custard took ~20 minutes to reach peak height and frostiness.
  • Transfer the ice cream to a lidded plastic container to firm up. Eat when, and with what, you desire—so long as you do it with great pleasure.

Sticky Date Cake with Salted Caramel Cream Cheese Frosting

Dessert
A three-layer slab of cake sits on the Chief Recipe Taster’s palm as a drizzle of salted caramel sauce oozes its way down the cake.

On the list of adjectives that describe me, “leaves well enough alone” does not make an appearance. Quite the opposite, which might be how I found myself, last year, working multiple jobs, training for multiple stupid-length endurance events, and travelling more than is good for me, let alone the planet. Needless to say, that didn’t leave me much time for food blogging (or for sleeping). I’m trying to dial it back now, which is, interestingly, exactly what I said in my last post in May 2022, right before I managed to get even busier.

This is not a sob story, especially since not being able to leave well enough alone has its advantages. It’s why I excelled as a law student (why not write one more brief), an endurance athlete (why not go one more mile), and a recipe developer (why not do one more test). It’s why I’ve forced my friends and Chief Recipe Taster to choke down multiple iterations of this sticky date cake with salted caramel cream cheese frosting, and why I came up with the idea in the first place—a layer cake version of sticky toffee pudding, with the very American addition of cream cheese. Also: salted caramel. Because sometimes not being able to leave something alone is a very, very good thing.

Sticky Date Cake with Salted Caramel Cream Cheese Frosting

Sources: Salted caramel sauce from Sally’s Baking Addiction; date cake adapted from Smitten Kitchen; frosting from I Thought There Would Be Free Food

Makes one 6-inch, three-layer cake; one 8-inch, two-layer cake; or one 9×13, single-layer cake

Active time: 90 minutes; total time: 3 hours

Notes:

  • Knowing that I can’t leave well enough alone, you might guess that I made my own salted caramel, and you would be correct! In my defense, it’s easy to do and really, really good. If you, however, are the type of person who can leave well enough alone, you could buy a jar of caramel ice cream topping and add salt to taste.
  • Below, I describe how to make the cake in one day, but you can make it over the course of several days. For example, you might make the caramel sauce one day, frosting the next, and bake the cakes and assemble the whole thing on the third.
  • My frosting recipe makes enough for a “naked” cake—i.e., there is only frosting between the layers, not on the sides. If you’d like to cover the entire cake, you’ll likely need to make a stiffer frosting (use more confectioners sugar) and make more of it, about 1 1/2 batches.

Salted Caramel Ingredients:

  • 1 cup granulated sugar
  • 6 tablespoons room-temperature butter, cut into 6 pieces
  • 1/2 cup heavy cream
  • 1 teaspoon salt

Sticky Date Cake Ingredients:

  • 2 1/4 cups pitted chopped dates
  • 2 1/4 cups boiling water
  • 1 1/2 teaspoons baking soda
  • 1 stick (8 tablespoons) butter
  • 3/4 cup light or dark brown sugar
  • 2 eggs
  • 1/2 teaspoon salt
  • 1 2/3 cups all-purpose flour

Salted Caramel Cream Cheese Frosting Ingredients: 

  • 8 ounces room-temperature cream cheese
  • 1 stick (8 tablespoons) room-temperature butter
  • ~1/4 cup salted caramel sauce (homemade or store-bought)
  • 2–2 1/2 cups confectioners sugar
  • Salt

Directions:

  • Make the caramel sauce: Heat the sugar in a heavy-bottomed saucepan over medium heat. Do not stir the sugar as it melts, but give the pan the occasional swirl so that the sugar melts relatively evenly and does not burn.
  • Once the sugar has melted, let it cook to a deep amber color. Take the saucepan off heat and whisk in the butter, one piece at a time. If the butter does not seem to incorporate, put the pan back on low heat and continue whisking; it should come together better. Add the cream and stand back—it will bubble and hiss and might spatter. Continue whisking vigorously. Put the pan over medium heat and let the caramel come up to, and stay at, a boil for 1 minute.
  •  Remove the caramel from the heat and stir in the salt (you can use more or less according to taste). Let the caramel cool while you make the cake.
  • Note: the caramel will solidify as it cools. It will also keep well in the fridge for several weeks; just warm it on low-power in a microwave to get it pourable again.
  • Make the cake: Combine the dates, boiling water, and baking soda in a bowl. Stir to combine, then set them aside while you prepare the rest of the cake.
  • Preheat your oven to 350°F. Butter and flour your cake pans, and line the bottoms with parchment paper. Set the pans aside.
  • Melt the butter in a large bowl in the microwave (you can also make the entire cake in a good-sized saucepan, if you prefer). When the butter is melted, whisk in the brown sugar, followed by the eggs and salt. Whisk in the flour, ensuring there are as few lumps as possible. Pour in the dates and their soaking liquid, whisking to combine. The batter will be very thin.
  • Divide the batter among your cake tins. (If you’re using 3 6″ tins, you’ll have about 440 grams per tin.) Slide the tins into the oven and bake for 30–35 minutes, until the cake are golden, feel slightly spongy when pressed, and a cake tester inserted into one comes out clean.
  • Let the cakes rest in their tins for ~5 minutes before inverting them, peeling off the parchment, and letting them cool on a wire rack.
  • Note: You can make the cakes the day before assembling. Let them fully cool before storing in an air-tight container at room temperature.
  • Make the frosting: Are your cream cheese and butter room temperature? If not, let them get there—it’ll make incorporating them much easier. If they are, cream them with a hand mixer or standing mixer until well incorporated. Scrape down the sides of the bowl before adding the caramel sauce and beating to combine. Scrape down the sides of the bowl and add 2 cups of confectioners sugar and salt to taste. Beat to combine. You should have a smooth frosting with enough structure to support the layers. If in doubt, add more sugar. Give the frosting a taste: if it’s gotten too sweet, add more salt to taste. Set the frosting aside.
  • Note: You can make the frosting a day or two before assembling the cake. Store in the refrigerator until an hour before you plan to use it. Give it a good stir to ensure consistent consistency before frosting the cake.
  • Assemble the cake: Carefully level the tops of your cakes with a serrated knife and set the tops aside. (Cake tops = baker’s reward!) Place one layer in the center of a plate or platter. Top with a good-sized dollop of frosting and spread to almost, but not quite, the edges of the layer. Repeat with the remaining layers. If possible, let the cake sit at room temperature for at least an hour for the layers to settle together and the frosting to seep in a bit. Cut with a serrated knife and serve with additional salted caramel sauce, if you want to gild the lily. Devour. Leftovers will keep at room temperature for 1–2 days, or in the refrigerator for several more.

Orange-Rosemary Polenta Cake

Dessert

I started developing this recipe in November, perfected it in December, and shot the photos in January. It is now, as you might be aware, May. Even for a very slow blogger such as myself (Exhibit A: Sourdough Croissants), this is, well—slow.

The tortoise-like pace of my writing has been in direct contrast to that of the rest of my life since the new year. Opportunities have been flying my way, thick and fast, and I’ve been trying hard to grab hold of them. My gratitude for those opportunities is boundless, but apparently my energy is not: I write this while sick with a cold, my body’s giving way a sure sign that I’ve been going a bit too hard since the New Year.

Life has taken a backseat to work these past few months, but I’m gradually reclaiming my non-professional personhood. Right now, what I crave most is time to be my full self. After months of never-ending to-do lists and not-enough rest, all I want is time to putter about the flat or play with our pup, time to read for pleasure or cook for more than sustenance. With such a craving for time, it’s unsurprising that I find myself turning to the slow recipes, the ones with lots to give: no-knead breads, long-simmered chicken stocks or stews. Unfussy, unpretentious food, that is abundant in forgiveness (nothing with a rigid schedule or that requires a great deal of attention) and in quantity (if one has little time to cook, one should make the most of that time). With the gift of time, baking and cooking—and, just as importantly, eating—are starting to feel like a joy again, not a chore.

This cake strikes exactly the right balance, requiring a bit of kitchen puttering but no master chef-level skills. (Unintentionally, it also strikes the balance between seasons, offering a good use for end-of-season citrus, before the rhubarb and strawberries arrive.) As orange slices cook in a simple syrup, you mince a bit of rosemary and fold it into a simple cake batter. Arrange the oranges in the bottom of the pan, pour in the batter, and bake; it even gets better after sitting for a day—another gift of time.

Orange-Rosemary Polenta Cake

Sources: loosely inspired by Melissa Clark’s Upside-Down Blood Orange Cake

Makes 1 8-inch cake

Active time: ~40 minutes; total time ~90 minutes

Note: You can candy the orange slices several days before making the cake. Simply store them, in their syrup, in the refrigerator until you’re ready to bake. Rewarm gently before using.

Ingredients:

  • 2 cups sugar, divided
  • 1 large orange
  • Fresh rosemary
  • 3/4 cup medium-grind cornmeal
  • 3/4 cup all-purpose flour
  • 1 1/2 teaspoons baking powder
  • 1 teaspoon salt
  • 2 sticks room-temperature butter (plus a bit more for buttering the pan)
  • 1 cup sugar
  • 2 teaspoons vanilla
  • 4 large, room-temperature eggs
  • 1/2 cup milk

Directions:

  • Preheat your oven to 350°F degrees.
  • While the oven is preheating, heat 1 cup sugar and 1 cup water in a small saucepan until boiling. Thinly slice the orange, peel and all, excluding any slices that are all pith. Once the sugar syrup is at a boil, reduce the heat to medium and add the orange. Cook, stirring regularly, until the peel is softened and translucent.
  • As the orange candies, finely mince the rosemary—you should have ~1 tablespoon.
  • Butter and flour an 8-inch cake pan; set aside. Stir together the dry ingredients (cornmeal, flour, baking powder, and salt) in a medium mixing bowl until well combined; set aside.
  • In a large mixing bowl, cream together the butter and sugar until light and fluffy. Add the eggs, one at a time, pausing to beat well to incorporate after each addition. Scrape down the bowl and add the vanilla, beating well.
  • Add half the dry ingredients, beating to incorporate, followed by half the milk. Mix well and scrape down the bowl. Repeat with the remaining dry ingredients and milk, mixing well and giving the bowl a final scrape down.
  • Using a fork or pair of tongs, gently lift the orange slices from the sugar syrup and let the majority of the syrup drip away before arranging the slices in the bottom of the cake pan. (It’s fine to get a little syrup in the pan.) Gently pour the batter over the oranges and smooth the top.
  • Put the cake in the oven and bake for ~45–50 minutes, or until the top is golden brown and a cake tester inserted into the center comes out with just a few crumbs clinging to it. Let cool for at least 10 minutes before inverting onto a plate or serving platter. This cake is best cut with a small serrated knife, and keeps beautifully, gently covered in plastic, for several days. It is superb garnished with a dollop of fresh, softly whipped cream.

Cinnamon Pecan Chocolate Tart

Dessert

Some of my recipes are attempts at recreation: I’ve eaten a dish that’s so good I simply must find out how to make it and put it on regular rotation in my kitchen. Others, however, start not as an attempt to recreate but to rectify, to do justice to what I thought something was going to be, before reality failed.

Such is the genesis of this tart. More than a year ago, my partner and went out for a hike and then stopped at a little French bakery outside of town. We picked up some bread and a pastry or two, and though my Chief Recipe Taster tucked into his choice before we’d even left the place, I waited. I was going to take my pastry—my pecan tart, you guessed it—home and savor it. The first bite would dazzle me. The cinnamon would supplement the toastiness of the pecans, offsetting the sweetness of the filling; the crust would crumble under my teeth. Sounds great, right? Except that that’s not what happened, not at all. I had my favorite chair and a good movie all right, but the tart was all wrong. It was too sweet, the filling a bit gloppy and the flavor cloying; the pastry didn’t shatter and didn’t really have much flavor, either. The best that could be said for the entire thing was meh.

I knew I could do better, so I set out to do so. My first attempts were uniformly meh as well. I’d decided to incorporate chocolate (because why not), but I couldn’t figure out the best way to do that. I couldn’t find a crust recipe that I liked. The fillings were all wrong—too sweet, not enough cinnamon, too thick. I got so frustrated, and so tired of eating trials and errors, that I put the recipe aside for awhile.

As soon as the weather turned cool this year, however, my thoughts turned back to the tart. “What if,” I wondered, “I coated the bottom of the tart shell with a chocolate ganache…” and because you can hardly ever go wrong when chocolate ganache is your starting point, I was off and running from there. A bit of research, a trial tart or two, and the recipe was done. After I’d baked the last trial tart, I sat down to give it a try. This time, it was everything I’d hoped for. Using a ganache, rather than just tossing chocolate chips into the filling, keeps the chocolate bitable; using a pate sucree, rather than a pie crust, keeps the pastry rich and finely textured, a nice counterpoint to the gooey filling. A judicious amount of salt keeps the sweetness in check, and the cinnamon makes it all more interesting. There’s no failure of reality here; this recipe more than does justice to what that original tart might have been.

Cinnamon Pecan Chocolate Tart

Sources: Crust adapted from, and filling inspired by, Dorie Greenspan’s Baking: From My Home to Yours

Makes 1 9-inch tart

Active time: ~60 minutes; total time ~90 minutes

Note: You can spread the work of this tart out over two days by making the tart crust and ganache ahead of time. If you do so, press the tart crust into the pan and cover well; store it in the refrigerator until you’re ready to fill and bake it. Likewise, cover and chill the ganache. Take it out of the refrigerator an hour or so before you plan to use it, or zap it on low power in the microwave until it’s spreadable again. Either way, give it a good mix to ensure it’s smooth and spreadable before using.

Crust Ingredients:

  • 1 1/2 cups all-purpose flour
  • 1/2 cup confectioner’s sugar
  • 1/2 teaspoon salt
  • 9 tablespoons butter, cut into 1/2-inch cubes and kept very cold
  • 1 large egg yolk

Ganache Ingredients

  • 1/4 cup bittersweet chocolate chips (I use Ghiradelli 60%)
  • 1/4 cup heavy cream

Filling Ingredients

  • 3/4 cup light corn syrup
  • 1/2 cup lightly packed brown sugar
  • 2 tablespoons butter, melted and cooled
  • 3 large eggs
  • 1 teaspoon vanilla extract
  • 1 tablespoon ground cinnamon
  • 1 teaspoon salt

1–1 1/2 cups pecan halves (not pieces)

Make the crust: Put the flour, sugar, and salt in the bowl of a food processor and pulse several times to combine. Sprinkle the butter cubes over the dry ingredients and pulse until the butter is cut in and is roughly the size of oatmeal flakes. Add the egg yolk and pulse for about 20 seconds several times. The sound of the food processor will change—this is your signal that the mixture is about to come together. Let it just barely do so, then tip the dough into a large bowl. Lightly toss it about a few times to ensure the ingredients are fully incorporated. Press about 2/3 of the mixture into the bottom of a 9-inch tart pan with a removable bottom and use the rest of the dough to line the sides. I like to roll my tart dough into logs and press those against the sides—I get a more consistent thickness around the edges this way. You can, of course, dump all of the dough into the tart pan and press it to cover the bottom and sides; baker’s preference. Let the prepared tart crust chill in the refrigerator for at least 30 minutes or up to one day.

Make the ganache: Put the chocolate chips in a heatproof bowl. Bring the heavy cream to a simmer then pour over the chocolate. Let stand for a few minutes, then slowly whisk until you have a silky, homogenous mixture. If not making the ganache ahead of time, let it cool to at least room temperature.

Preheat your oven to 375°F degrees.

Make the filling: Whisk all of the ingredients together until smooth and well combined. Rap the bowl against your counter a few times to surface and pop any air bubbles. Set aside.

Put it all together: Remove the tart shell from the refrigerator and place it on a cookie sheet covered with parchment paper. Spread the bottom of the tart shell evenly with the ganache. If your tart shell is very cold, the ganache might freeze on impact; this is nothing to worry about. Gently pour the filling over the ganache. Arrange the pecan halves decoratively on top of the filling and carefully slide the tray into the oven. Bake for 30–35 minutes, until the top is puffed and the filling doesn’t jiggle much when you give the tray a shake.

Let the tart cool completely to room temperature—which will take several hours—before slicing. Enjoy with vanilla ice cream or fresh, homemade whipped cream. This tart is best eaten the day it’s made.

Molasses Cookies

Dessert

Most every Labor Day, I set off to bike across Michigan with my father and my partner, usually a family friend or two. It’s one of my favorite events of the year.

The ride is DALMAC, a five-day, volunteer-run tour that’s been going on for 50 years. It’s a simple premise: you leave from Michigan’s state capitol, Lansing, and ride to the northernmost point of the lower peninsula, Mackinac City. The days are simple, too: you wake up, pack up, ride 70 miles, unpack, eat. You’re responsible for so little, just getting yourself from point A to point B, and there is great joy in that simplicity.[SF1]  There’s nothing more in the way of agenda, no long to-do list—just you, your bike, and Michigan.

In the good years, when the weather is fine*, DALMAC can convince you that Michigan is the most beautiful place on earth. The first two days take you through farmland, flat, green, fecund patches of earth. Then you come into the rolling hills of northern Michigan, with their foggy mornings and the sharp tangy smell of wild apples. By the fourth and fifth days, you’re skirting around the shore of Lake Michigan, catching glimpses of the clear blue water as you climb and dip and curve around vineyards and pastures and yet more farms. Every year, I catch myself wondering if there is any place more breathtaking than Michigan during the slide from summer into fall.

Michigan is indisputably lovely, but some of my sentimentality about DALMAC might also be due to the company of two of my favorite people (my dad and my partner) and some of it to the food, Midwestern cuisine at its finest. The food at camp might be utilitarian rather than gourmand, but the food along the route more than makes up for it. There’s the campground at Lake George with its huge, smoking grills full of brats, burgers, and hot dogs; the girls’ cross-country team that sells root beer floats outside of Marion; the Douglas Lake Bar and Steakhouse in tiny Pellston; the little church on the hilltop in East Boardman or the Good Hart General Store along the lake, both with endless rows of baked goods. And, last but not least, there is the thing that we ride for, the promise of which makes tired legs pump harder and any size hill seem manageable: the DALMAC molasses cookie.

Along every route, the tour organizers arrange a few rest stops along stretches where there aren’t many other options for food, and if you’re very lucky, the organizers will have cookies at a few of those stops. Let me tell you about these cookies: they are the size of your face. There are hundreds of them, in all the greatest-hits flavors—chocolate chip, oatmeal raisin, peanut butter, and the sublime molasses. Your day’s riding might have been chilly or hilly; you might be close to bonking; your bum might be very, very, sore, but these cookies are magic. Bite into a thick molasses chomper and forget your woes; they’re soft, redolent with butter and spice; pleasantly but not-too sweet. These cookies are mythic: we talk about how good they are months after we finish the ride.

And if a cookie is that good, you’ve got to have it more than once a year, right? But frankly, I despaired of every making a molasses cookie as good as the ones I had on DALMAC. Fresh air, a ravenous appetite, and the golden glint of nostalgia make everything taste better. I tried here or there throughout the years, generally landing on something that was good but not great. Finally, however, I found the right formula: a generous but not overly so amount of spice; all brown sugar for deeper flavor, and just enough flour to give the cookies heft without impeding their buttery softness. They might not be quite as good as a DALMAC cookie eaten on an and-of-summer day in Michigan, but these come pretty close.

*For the sake of honesty, I must add that the weather is NOT always fine—there’s a reason we refer to the 2010 ride as “DALMAC of the damned.”

Molasses Cookies

Source: Adapted from The New Best Recipe

Makes ~9 or 10 four-inch cookies

Active time: ~30 minutes; total time ~45 minutes

Ingredients:

  • 12 tablespoons butter, at cool room temperature
  • 1/2 cup brown sugar (dark or light)
  • 1 large egg yolk
  • 1 teaspoon vanilla
  • 1/2 cup molasses (dark or light but not blackstrap)
  • 2 1/4 cups all-purpose flour
  • 1 teaspoon baking soda
  • 1 1/2 teaspoons ground cinnamon
  • 1 1/2 teaspoons ground ginger
  • 1/2 teaspoon ground cloves
  • 1/2 teaspoon ground black pepper
  • 1/4 teaspoon ground allspice
  • 1 teaspoon salt
  • 1/2 cup granulated sugar, for cookie rolling

Directions:

  • Center two racks in the middle of your oven, then preheat it to 375°F. Line two baking trays with parchment paper; set aside.
  • Cream the butter and sugar together until the mixture has lightened in color and texture. Add the egg yolk, vanilla, and molasses, and beat to combine. Scrape down the bowl.
  • Add all of the dry ingredients (flour through salt), beating on the lowest speed to incorporate. Give the bowl a scrape to ensure that you’ve incorporated all of the dry ingredients, and mix again briefly, if needed.
  • Portion the dough into 9 or 10 balls—it will be soft, so you may need to lightly wet your hands to prevent it from sticking. Roll the balls in the sugar, then transfer to the baking trays; give each dough ball plenty of space to expand.
  • Put the trays in the oven and allow the cookies to bake for 5 or 6 minutes; rotate the sheets from top-to-bottom and side-to-side. Bake for an additional 5 or 6 minutes. When you pull the trays from the oven, the cookies should be set along the edges, lightly puffed and browned, but still a bit wobbly in the center. This is fine; a slightly undercooked cookie is always superior to a slightly overcooked cookie.
  • Let the cookies cool as long as you can stand—I won’t advocate burning your mouth but they really are best when still warm. Anything you don’t immediately consume will keep well, covered on your counter, for a few days.

Lemon Raspberry Bars

Dessert
Five lemon raspberry bars (shortbread crust, raspberry jam, and lemon curd) sit stacked on Sarah's Chief Recipe Taster's hand.

I will never claim to understand inspiration. Sometimes I go weeks with nary an idea in sight and then have an avalanche of them. Sometimes I need to research and think deep weighty thoughts before an idea takes shape; other times, an offhanded comment is enough to get me started.

Such was the case with these bars. In mid-April, my Chief Recipe Taster and I were out hiking with a friend. As we got close to lunchtime, the talk naturally turned to food—what we’d been cooking lately, what we were in the mood for. Our friend mentioned that she’d recently made lemon bars and added a few fresh raspberries on top. The thought of a lemon raspberry bar made my mouth water. Inspiration seized me: I had to make my own. My ideal bar would be easy, made completely in the food processor; they would be somewhat seasonal (fresh raspberries were months away, at that point); and throw-together-able, with ingredients I usually had in the kitchen (lemon juice and raspberry jam). They’d be the kind of thing you could make with minimal effort and little forethought.

Sounds great, you might say. But wait a minute—you got this idea in mid-April and are just now posting about it at the end of June? Yes, that’s correct, and it wasn’t for lack of trying—it was because my Chief Recipe Taster can only eat so many desserts a day. After six(!) batches with a variety of problems (too much butter, too much filling, an unworkable idea for a crumb topping), I finally got reality to match inspiration. I might not understand inspiration, but I’m always happy when it strikes.

Lemon Raspberry Bars

Source: I Thought There Would Be Free Food

Makes 1 8×8-inch pan, ~9 squares

Active time: ~15 minutes; total time: ~65 minutes

Crust Ingredients

  • 1 cup all-purpose flour
  • 1/3 cup confectioners’ sugar
  • 1/2 teaspoon salt
  • 1 stick butter, cut into 8 pieces

Filling Ingredients

  • 1/2 cup lemon juice (either bottled or fresh-squeezed are fine)
  • 1 cup confectioners’ sugar
  • 3 eggs
  • 3 tablespoons raspberry jam (either seed-full or seedless will work)

Extra confectioner’s sugar for dusting, if desired

Directions

  • Center a rack in the middle of your oven, then preheat it to 350°F.
  • Butter and flour an 8×8-inch baking dish. Set it aside.
  • While the oven is heating, put all of the crust ingredients (flour, confectioners’ sugar, salt, and butter) into a food processor. Pulse several times for a few seconds each go, then leave the processor running until the dough starts to clump together, about ~45 seconds. It’s okay if the mixture isn’t uniform—a few stray crumbs won’t matter.
  • Tip the crust into the prepared baking dish and use the heel of your hand, or a large spoon, to firmly press the crust into the dish. Prick the crust several times with a fork, then slide the dish into the oven and bake until golden brown, ~20 minutes.
  • While the crust is baking, add the lemon juice, confectioners’ sugar, and eggs to the food processor (no need to clean it before doing this) and process until the filling is well-blended and uniform. Let it settle, stirring gently if needed, to get rid of any froth on top of the mixture.
  • Once the crust is done, remove it from the oven and lower the oven temperature to 325°F. Spread the crust with the raspberry jam. Slowly, slowly pour the lemon filling over the jam, taking care so as not to mix the two layers. Return the dish to the oven and bake for a further ~25-30 minutes, until the edges are lightly brown and the center is set (you’re looking for a Jell-O like jiggle, not the Kool-Aid man).
  • Let the bars cool completely before dusting them with powdered sugar, if you’re so inclined. Cut and eat.

Rosemary Shortbread

Dessert
Sarah's left hand is caught in the act of breaking a piece of rosemary shortbread in two.

All winters, in my opinion, have a tendency to feel monochromatic (fifty shades of gray skies and dirty snow) but this one has also felt monotonous. The news cycle was almost universally depressing and often the same—political turmoil, all-too visible manifestations of white supremacy, pandemic—as was lockdown life: work, eat, sleep, repeat. I found myself in a rut, begrudgingly performing the patterns of life. I desperately wanted, needed, some newness but didn’t know how to find it within the confines of quarantine. All of the things I would have done pre-COVID (planned a trip, met up with friends, gone to a museum or art show or film) felt closed off.

Apparently, however, I start to get creative if I get frustrated enough. A few weeks ago, I began to look for ways to make the familiar a little bit unfamiliar, to add something of the unexpected to the expected. It’s small things: walking our puppy a slightly different route, attending a live-streamed play, starting a new workout program. It isn’t much, but it’s been enough to help me shake my gloom, and to consider ways to apply that thinking to this blog. I started here, combining two things—rosemary and shortbread—that are familiar, but not familiarly used together. It’s an unexpected combination, but somehow the herb makes the vanilla in the cookie more vanilla-y, the butter more butter-y; adding something new helped me appreciate what was already there. The experiment paid off: not only was the shortbread delicious and worth sharing, it has me excited to think of other ways I might introduce the unexpected into my life, my food, and my writing.

Rosemary Shortbread

Sources: adapted from my mom’s recipe

Makes one 9-inch pan

Active time: 15 minutes; total time 45 minutes

Ingredients:

  • 2 sticks butter, softened
  • 1 teaspoon salt
  • 1 teaspoon vanilla
  • 1/2 cup confectioner’s sugar
  • 2 cups flour
  • 1 1/2–2 tablespoons finely minced rosemary, depending on how pronounced you’d like the flavor to be

Directions:

  • Center a rack in the middle of your oven, then preheat it to 350°F.
  • While the oven is preheating, cream together the butter, salt, vanilla, and sugar in a large bowl.
  • Add the flour and rosemary, and mix well to combine.
  • Tip the dough into a greased 9-inch pan and pat it down firmly, distributing it evenly throughout the pan. The shape of the pan is up to you—use a 9-inch square, a round, or a tart pan—as is material; both glass and metal work fine.
  • Prick the shortbread all over with a fork. You can do this as decoratively or haphazardly as you want; you don’t need to make it look like a pin cushion, but get in at least 9 or 10.
  • Bake the shortbread for ~30 minutes, or until the edges are light golden brown. Let it cool for about 10 minutes before slicing, and cool fully before eating and enjoying.